// GameMaker 101
Hello, all! I'm Gabriel and today I'll teach you a little bit of GameMaker. GameMaker is a 2D game engine that is free to use as long as your projects are non-commercial.
// Downloading GameMaker
I recommend using the Steam version so just you can show off how many time you have coded. However, you could use the official website to download it. To test your game on your local machine you don't need an account.
// Interface basics
The interface is quite simple to be honest, but it is more complex than the older version (GMS2 and before). When you open GameMaker you will see the home page. This page is where you can create, open and import projects. To create a game use the "new" button on the top and select a blank game; give it a name (and a location) and hit "Let's Go!"
Your interface should look something like this:

This is my game SausageCat, but yours should be empty. Let's dissect this interface and learn it little by little!
// Menu
Let's start with the simplest part: the menu.

What we are going to focus here are these buttons:

The first one is the Debugging button. Please listen me: LEARN TO DEBUG!!! Debugging is when you can pause the execution of your game and execute every line of code manually to see if there are bugs or crashes. This is the most useful thing built in any game engine in my opinion. Learn to debug and you'll learn how to program. With that said, the debugging part of the tutorial will be later (when we actually start coding), but keep this in mind.
The second one is the play button. When you click it your game will start running and you will be able to play it. I recommend using the shortcut F5. The third one is for when you need to stop your game. This is more useful than it seems. And the last one is for cleaning your cache memory (when your textures are showing garbage instead, click this button).
// Objects, sprites and rooms
The three most important types of assets in a GameMaker game are objects, sprites and rooms. Sprites are any image that is in your game. The player graphics are sprites. The background is a sprite as well. Objects are where our logic is implemented. For the sake of this tutorial, the only way to code in GameMaker is via objects (if you're more advanced, please keep your mouth shut I know that this is not the only way, but it is the most intuitive way and the way you use normally). Finally, rooms are where your game happens. Objects can be placed in the rooms to execute their code.
// Create a Sprite
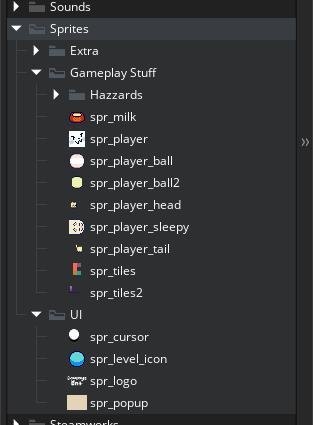
To create your very own sprite, right click on any folder in the "Assets" tab (although I recomend the default "Sprites" folder) and choose Create->Sprite. You have a sprite now! I suggest you to name it with snake case and with the prefix "spr_" because GameMaker can't have two things with the same name.
Your sprites folder should look something like this (except with only one sprite and no subfolders):

